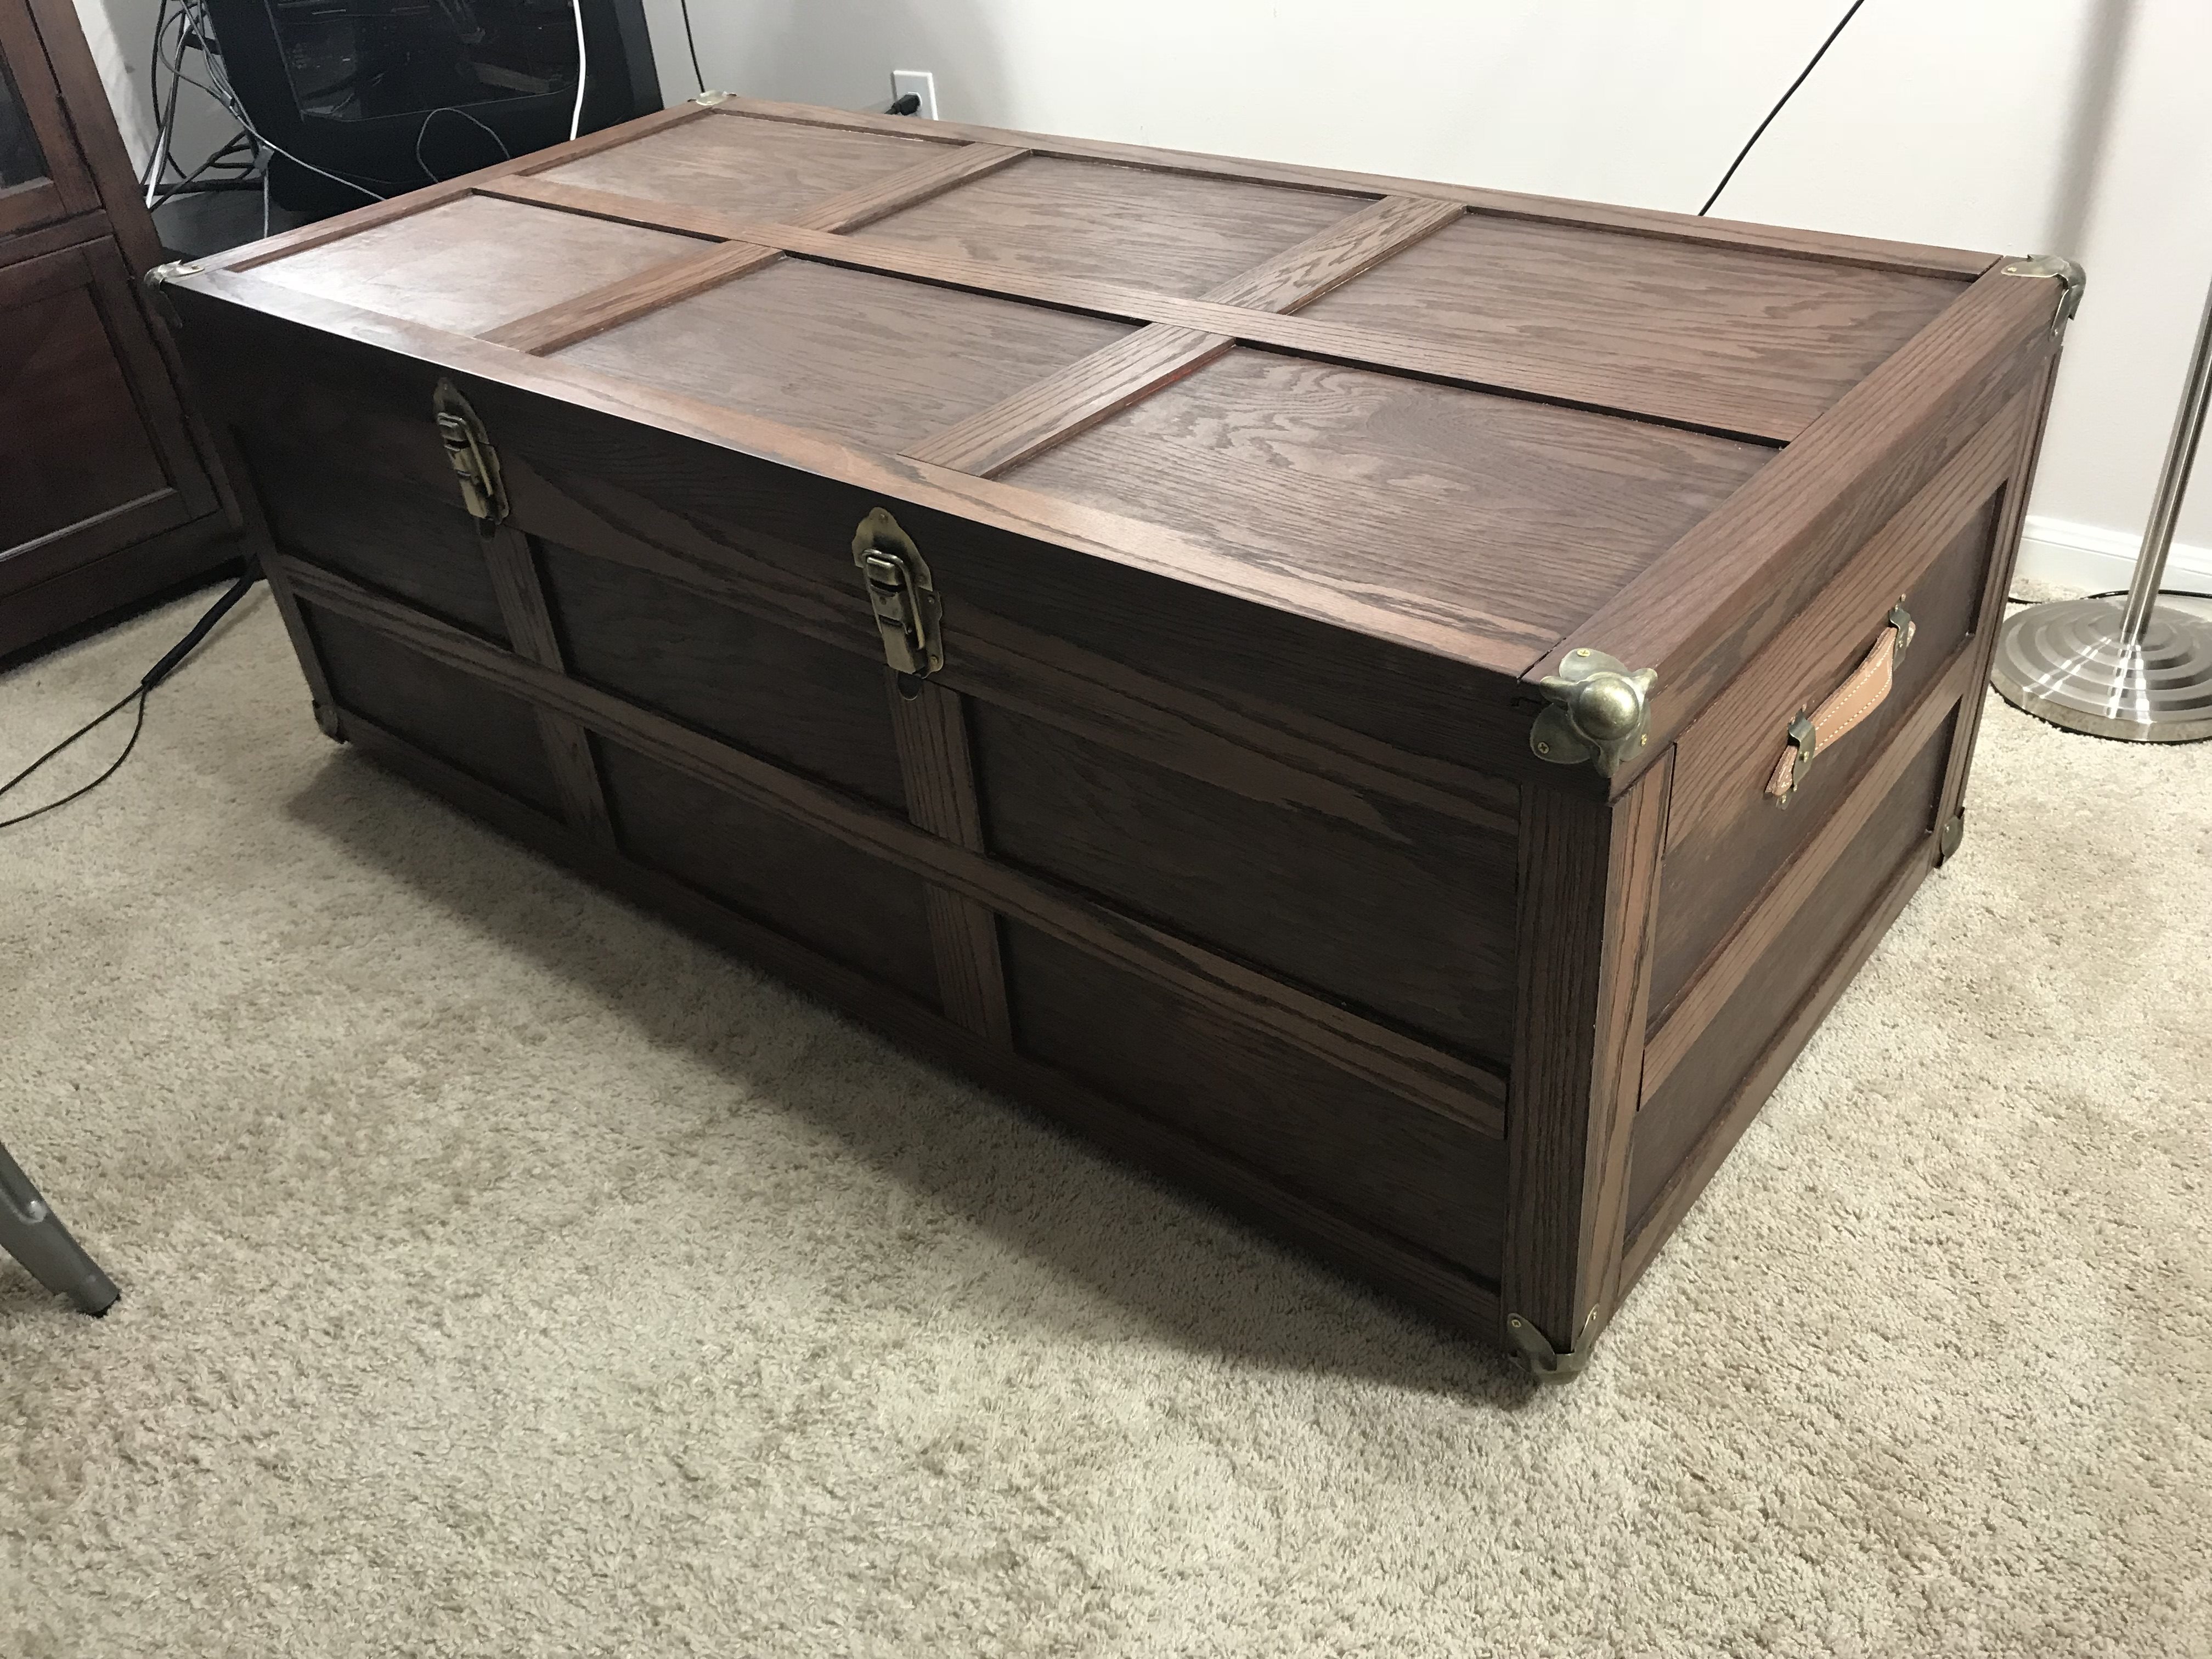
The project originated in the need for a virtual flying cockpit that could be easily and quickly converted to a piece of furniture suitable for display in our home. My gaming area is located on the second level landing and cannot be shut behind a door. I decided on something that looked like a steamer trunk from the days of steamship travel. Here is a picture of the finished piece so you can see where all this is going.
I decided that it was critical to design the final enclosure around a cockpit seat that I had thoroughly tested so the seat and controllers arrangement was designed and built first. I started the design process by referencing an old military specification for cockpit design, MIL-STD-1333B.
The build started with the cockpit floor. The seat, rudder pedals, joystick mount and throttle side console are all mounted on the single piece cockpit floor.
The floor is 3/4 inch paint grade exterior plywood. Its dimensions are 58 inches by 26 inches.

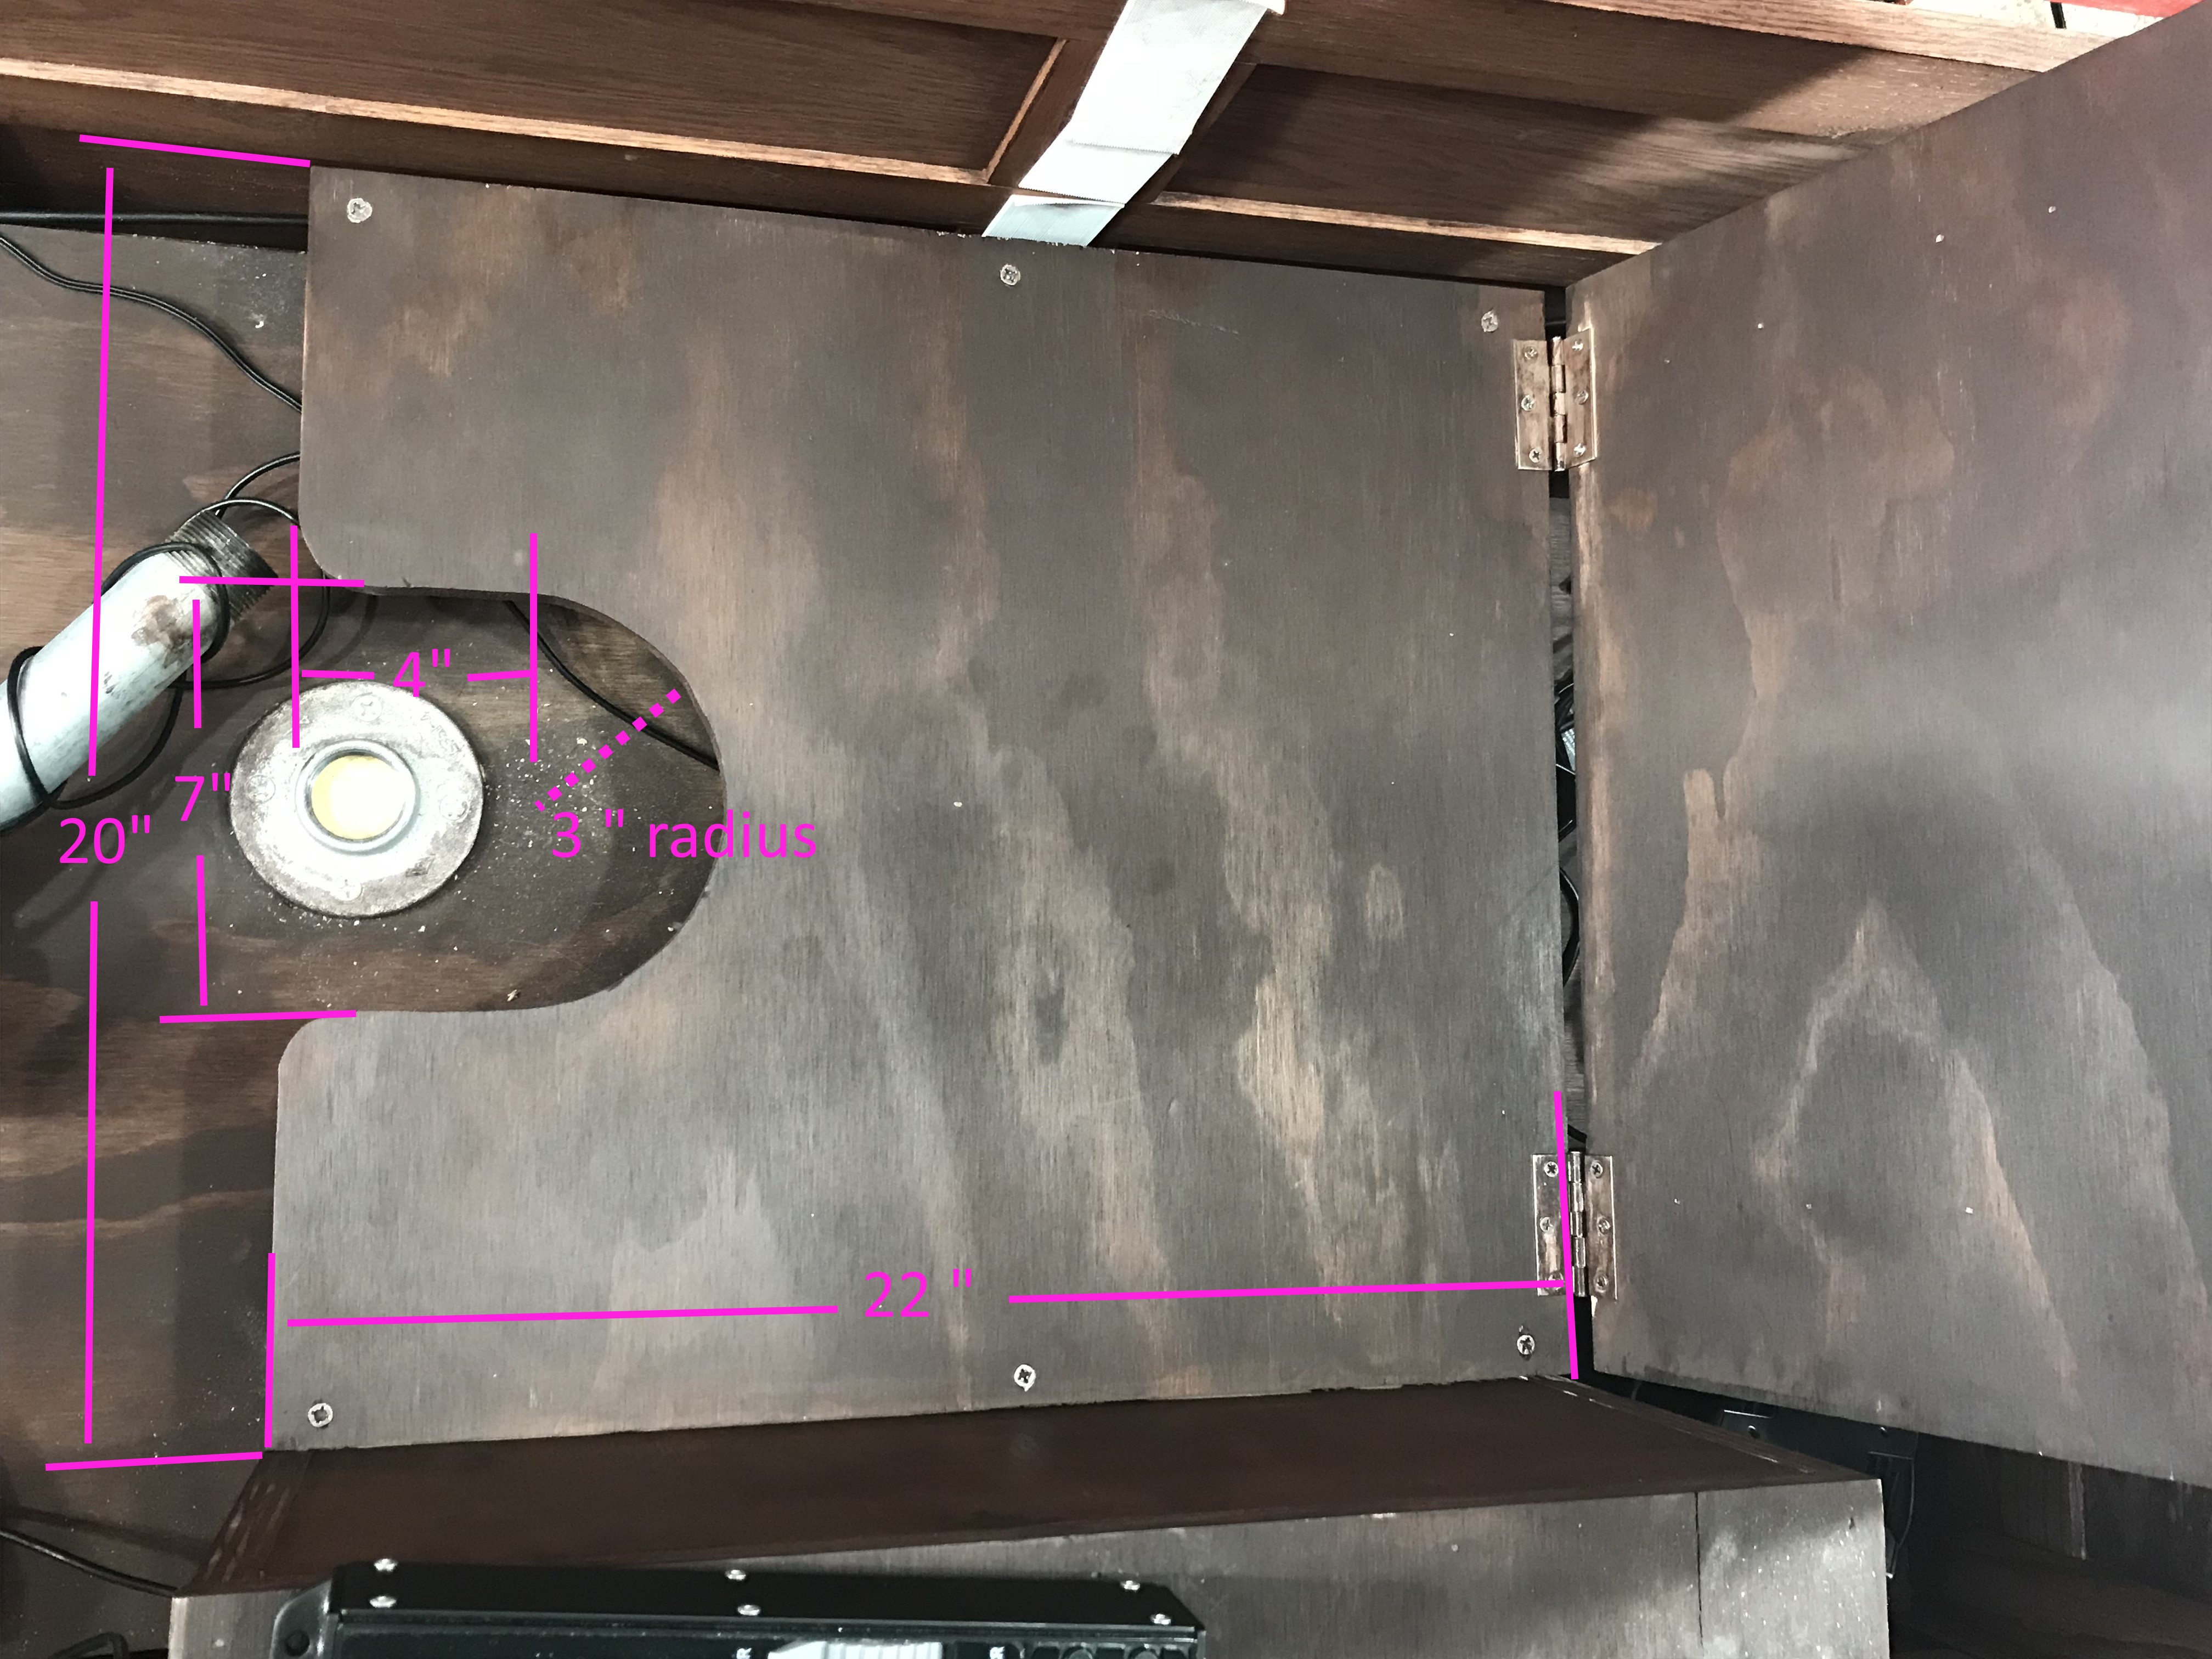
Next is the seat pan. Again, 3/4 inch paint grade exterior plywood. Cut a rectangle 22 inches long by 20 inches wide. The joystick cutout (cut on one of the 20 inch sides) is 7 inches wide and 7 inches deep. The 3 inch radius cut is centered at 4 inches from the front edge.
The seat pan sits on 22″ nominal 2″x 4″ rails on the left and right. It is mounted very low to allow the seat back to fold down and clear the box lid.
The seat back is the same plywood cut to to the same size as the seat pan (20″ x 22″) and hinged to the pan. The back supports are 2 x 4 cut with a 15 degree angle and mounted so that the seat back is angled at 15 degrees when in position.
The throttle side console is 6″ wide x 22″ long x 13″ high. The height should be adjusted to ensure the box is flush with the side of the finished box.